
Decks are a great way to add outdoor living space and value to your home. Installing a deck can be time consuming and intimidating, but with this step-by-step guide, you’ll have your new deck assembled in no time! Find out how to get the job done right, from start to finish.
Introduction to Deck Installation
If you’re planning on adding a deck to your home, you’re in for a treat! Not only will you get to enjoy the outdoors more with friends and family, but you’ll also get to increase the value of your home. Installing a deck is not as difficult as you may think, and with our step-by-step guide, you can have it done in no time.
The first thing you need to do is determine where you want your deck to be located. Once you have a spot picked out, take measurements and mark the perimeter with stakes. Then, using a string line or laser level, create a reference line to make sure your deck is level.
Now it’s time to start digging! You’ll need to excavate the area within the perimeter so that the footings can be installed. The depth of your footings will depend on the height of your deck and the soil conditions in your area – be sure to check with your local building code for guidance. Once the excavation is complete, fill the holes with concrete and allow it to cure for at least 24 hours.
Next, it’s time to install the framing for your deck. Begin by attaching the ledger board to your house (be sure to use proper fasteners and flashing), then add the joists and crossbeams. Once everything is securely in place, add the decking boards – start at one end and work your way towards the other.
Tools Needed for Deck Installation
- A drill – You will need this to create pilot holes for your decking screws.
- A saw – You will need this to cut your deck boards to size.
- Decking screws – These are specially designed for installing decking and will make the job a lot easier.
- A hammer – This is needed to drive the nails into the joists.
- Nails – These are used to secure the decking boards to the joists.
- A level – This is essential for making sure your deck is level and even.
- A tape measure – This is needed to accurately measure all of your materials before cutting or assembling anything.
Step by Step Instructions on How to Install a Deck
Assuming you have all the tools and materials required for the job, installing a deck can be completed in just a few hours. Here are the steps you need to take:
- Choose the location for your deck. You will need to take into account factors such as the size of your yard, the orientation of the sun, and any existing features or structures that might need to be incorporated into the design.
- Mark out the perimeter of your deck with string or chalk so you know where to dig the holes for your support posts.
- Dig holes for your posts, making sure they are at least 30 inches deep and 8 inches in diameter. Fill the bottom of each hole with gravel before setting in the posts.
- Mix concrete and pour it around each post, using a level to make sure they are plumb. Allow the concrete to cure for 24 hours before proceeding.
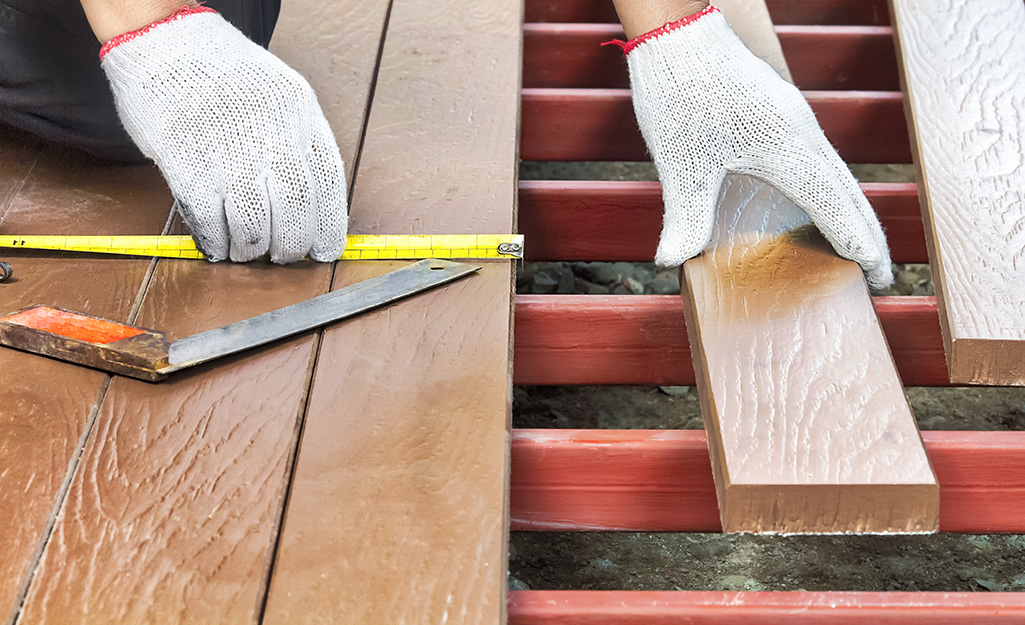
- Cut your joists to size and install them between the posts, attaching them with galvanized nails or screws. Make sure they are level before moving on.
- Install your decking boards, starting at one end and working your way towards the other. Make sure each board is properly secured before moving on to the next one. Nail or screw them into place, predrilling holes first if necessary to avoid splitting the wood.
- Finish up by trimming off any excess decking material and adding finishing touches like railings, benches, and other decorations.
Now your deck is ready to use! Enjoy the warm weather in style.
Finishing Touches for Your New Deck
Once your deck is installed, it’s time to add the finishing touches! Here are a few ideas to get you started:
-Add some outdoor furniture and decor to make your deck feel like an extension of your home.
-String up some lights to create a warm and inviting atmosphere for evening entertaining.
-Install a fire pit or chiminea for added warmth and ambiance on cool nights.
-Add a pergola or trellis for additional shade and privacy.
Tips on Maintaining Your Newly Installed Deck
If you’re thinking about installing a deck, congratulations! You’re about to add a beautiful and functional outdoor space to your home. But once your deck is installed, what then? How do you care for it so that it will continue to look good year after year? Here are some tips on maintaining your newly installed deck:
- regular cleaning is key – sweep away debris and hose down your deck regularly to keep it clean. A pressure washer can also be used for tougher dirt and grime.
- stain or seal your deck – depending on the material of your deck, you may want to stain or seal it to protect it from the elements and extend its life. Be sure to follow the manufacturer’s instructions when doing this.
- check for damage regularly – inspect your deck periodically for signs of damage, such as splintering wood or loose nails/screws. Repair any damage as soon as possible to prevent further deterioration.
By following these simple tips, you can enjoy your deck for many years to come!
For more information on Deck installation in Washington DC, visit this Website.
Conclusion
Installing your own deck can be a daunting task if you don’t know where to start. Hopefully, after reading this step-by-step guide, you now have the confidence and knowledge needed to tackle this project with ease. With some patience and attention to detail, you’ll be able to complete your installation quickly and safely. And in no time at all, you’ll be enjoying the outdoor space that your beautiful new deck provides!