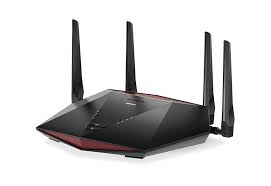
How Do I Setup Netgear Nighthawk XR1000 Router?

The Netgear Nighthawk XR1000 Router Setup is the process of configuring and connecting the Netgear Nighthawk XR1000 router to the internet and setting up the wireless network for devices to connect to. This involves connecting the router to the modem, accessing the router’s web interface, configuring network settings such as the SSID and password, and setting up any additional features such as parental controls or port forwarding.
The setup process typically involves following a set of instructions provided by the manufacturer or a service provider to ensure the router is set up correctly and securely.
Login to Netgear Nighthawk XR1000 Router
To log in to your Netgear Nighthawk router, including the Nighthawk XR1000, follow these steps:
- Connect your device to the router using an Ethernet cable or via Wi-Fi.
- On your device, launch a web browser, and enter the IP address of the router into the address bar.
- 192.168.1.1 is frequently used as the default IP address for Netgear routers.
- If none of these work, look up the correct IP address in your router’s manual.
- The router’s login page should appear. Enter the router default username and password.
- The default username is usually “admin” and the default password is usually “password” or “1234”.
- If these do not work, check your router’s manual for the correct login information.
- Once you have logged in, you can access the router’s settings and make any necessary changes.
It is recommended that you change the default login credentials to ensure the security of your router.
Netgear Nighthawk XR1000 router Manual setup
Follow these steps for Netgear Nighthawk XR1000 router setup using manual method:
- Remove any backup batteries from your modem before turning it off.
- After plugging the modem in, wait a few seconds for it to turn on.
- Connect the router’s internet port on the Ethernet cable to the modem.
- To activate your router, connect it to the power source.
- Then, employ the Wi-Fi network name and password to link your computer to the Nighthawk XR1000 router.
- Write down the network name and password from your router’s label.
- Open any web browser on your computer.
- Enter routerlogin.net into your browser if the installation assistant does not appear automatically.
- Following the instructions, finish the Netgear Nighthawk XR1000 router setup and establish an internet connection.
Netgear Nighthawk XR1000 router Setup common Issues
- Firmware Update: If the firmware of the router is outdated or not updated, it may cause several issues during the setup process.
- Internet Connection Issues: If the internet connection is not stable or there is an issue with the ISP, the router setup may not be successful.
- Incorrect Configuration: The router settings need to be configured correctly, and any wrong settings may cause issues in the setup process.
- Wi-Fi Range Issues: The router’s signal strength and range may not be enough to cover the entire house, and this may cause connectivity issues.
- Compatibility Issues: If the device used for setup is not compatible with the router, it may cause issues in the setup process.
- Password Issues: The user needs to have the correct login credentials for the router, and any incorrect passwords may cause issues in the setup process.
- Device Placement: The router needs to be placed in a central location, and any obstructions or interference may cause connectivity issues.
Troubleshoot Netgear Nighthawk XR1000 router Setup Issues
Following are the steps for trouble with Netgear Nighthawk XR1000 router setup issues:
- First, check each cable connection, including the Ethernet and power cables.
- Disconnecting the cable is not permitted.
- Between the router and the modem, leave a clear path. Make sure there aren’t any WiFi signals that are competing.
- If you have the majority of your devices connected to your network, turn off any that are not in use.
- Verify the power supply to the Netgear Nighthawk Pro Gaming XR1000 router.
- Check the web browser first if the router login failed.
- There should be no phase-out of the web browser.
- Clear the cache and cookies, and if necessary, turn off any proxy servers.
- Restart the router, the modem, and the entire network.
- Configure a hard wired connection if you are using wireless connectivity.
How Can I Change My Netgear XR1000 Nighthawk WiFi Name and Password?
The default SSID (or WiFi name) and password are found on the router label. Change your Netgear XR1000 Nighthawk router network name and password by following these steps:
- After logging in, go to Settings > Setup > Wireless Setup.
- It then shows the Wireless Settings screen.
- It is possible to configure the 2.4 GHz and 5 GHz bands independently.
- Fill out the Name (SSID) field with your new name.
- From the Security Options menu, select WPA.
- WPA2 options use the most recent standard to offer the highest level of security. It is set to WPA2-PSK [AES] by default.
- The Pass field can be seen.
- Enter the network key in the Password field (password)
- Press the Apply button to keep the changes in place.
The Netgear Nighthawk XR1000 router setup was previously explained. The reasons behind the setup’s issues were also discussed. The Nighthawk XR1000 keeps disconnecting issues and can thus be quickly fixed. In setting up your Netgear Nighthawk pro gaming router, I hope this post was helpful.